Full Bust Adjustment - With Bust Darts
Blogger: Jenn Williams
A full bust adjustment is needed when the sewing cup size is larger than the cup size the pattern is drafted for. Most of Styla's woven patterns are drafted for four sewing cup sizes: A, B, C, and D. If you are larger than a sewing cup size of D, a full bust adjustment is needed.
A sewing cup size of D means the difference between the upper bust and full bust is 4” (10 cm). For example, if the upper bust is 31” (78.5 cm) and the full bust is 35” (89 cm), there is a 4" difference. Therefore the sewing cup size is D. If the difference is greater than 4” (10 cm), a full bust adjustment will be done on the D cup bodice.
For this blog, we are going to assume a full bust size of 36” (91.5 cm) and an upper bust size of 31” (78.5 cm). The difference is 5” (13 cm). Based on the upper bust size, a size 2 bodice will be needed. We will use the size 2 D cup to perform the full bust adjustment.
Because the D cup bodice already has a difference of 4” (10 cm) drafted into it, we only need to add 1” (2.5 cm) to get to the 5” (13 cm) difference that we previously calculated. We are also only working with half of the bodice since it is cut on the fold. Therefore, the 1” (2.5 cm) difference gets divided by two to account for only working with half of the bodice to give us 0.5” (1.3 cm).
To begin, cut out two of the size 2D bodices. You will be manipulating one bodice and using the second bodice as a guide for the last step.

Mark the approximate location of your apex (nipple). Do this by holding the pattern piece up to your body. The apex will typically be at the end of the dart.
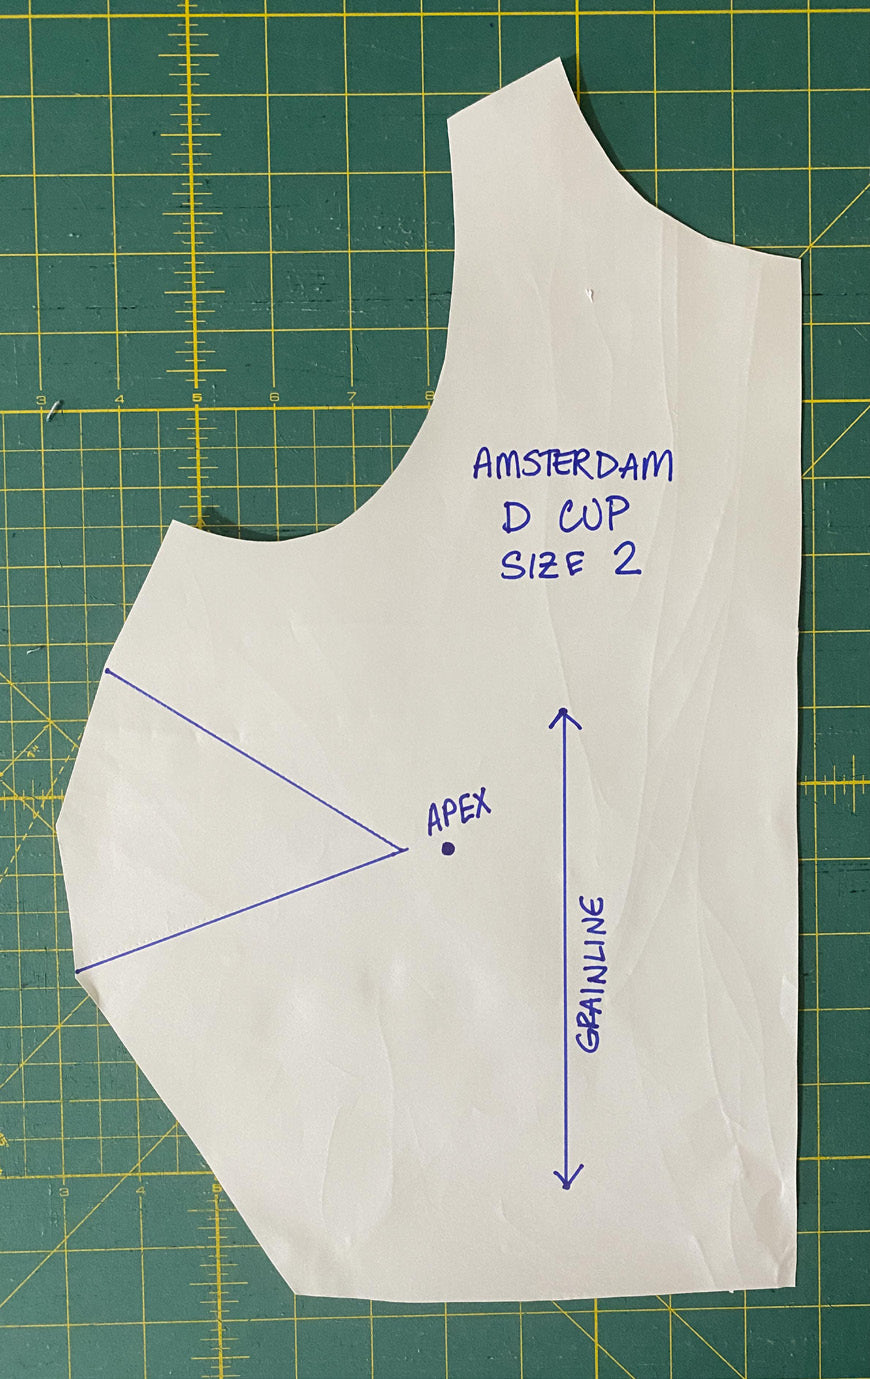
Draw three lines from the apex as shown below. Line 1 is drawn to approximately 1/3 of the way up the armscye. Line 2 is drawn through the middle of the dart to the side seam. Line 3 is drawn straight down to the waist.

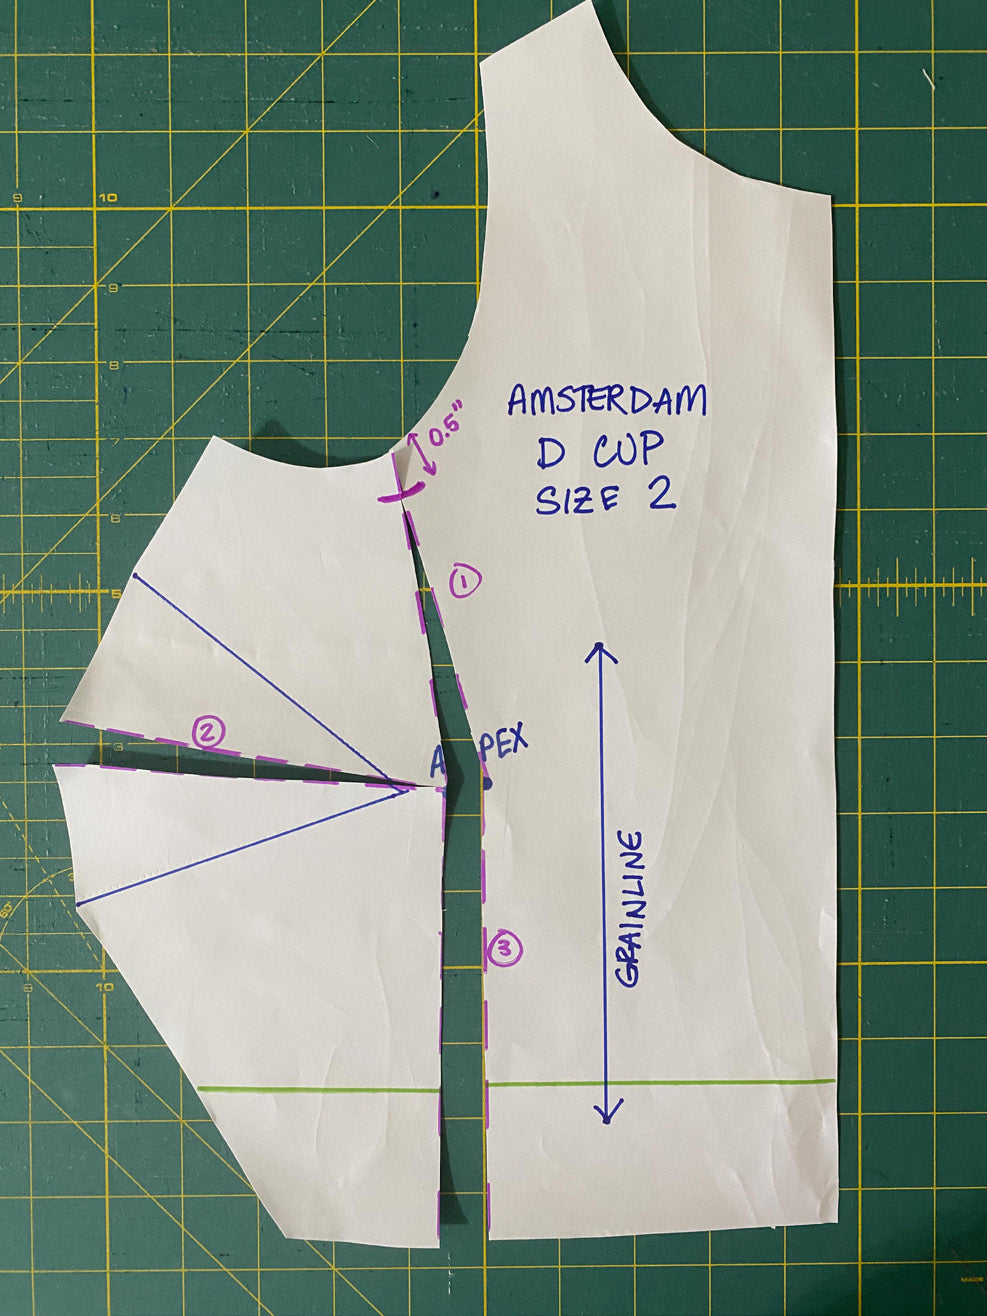
To ensure that the arm curve is not altered, the seam allowance must be marked on line 1. Measure down 1/2” (1.3 cm) as shown below and make a mark.

The last line that needs to be drawn is a horizontal line across the bodice. The lengthen/shorten line can be used for this. It is shown below in green.

Starting at the waist, cut up line three to the apex. Continue up line 1 to the seam allowance mark. Do not cut through the seam allowance mark. Starting at the arm curve, cut along line 1 to the seam allowance mark but do not cut through the seam allowance mark. This will create a pivot point at the seam allowance mark. Starting at the side seam, cut along line 2 to the apex but do not cut through the apex or the previous cut line. This will create a pivot point at the apex.

The bodice should look like the following picture if you pull the cut lines apart a little.
Using a ruler or a cutting mat as a guide, create a 1/2” (1.3 cm) gap along line 3 as shown below. Ensure that the two sides of line 3 stay parallel. The dart will naturally open as you maneuver the paper.

Slip a piece of paper under the bodice and tape the pieces down. Trim away any excess paper.

The waistline is now uneven after opening the dart which is shown by the break in the green line. Starting at the center front, cut along the green line until line 3 is reached. The cut line is highlighted in yellow. Slide the cut rectangle (highlighted in yellow) down until the green line is even. Tape the rectangle into place.

The next step is to correct the waist ease. The 1/2” (1.3 cm) gap that was created to account for the fuller bust also added to the waistline. This extra ease must be taken out. Place the original size 2D bodice on the revised bodice and mark the original waist line.

Remove the original bodice and draw in a new side seam from the mark made to the bottom of the dart. Trim the bodice along the new side seam. Lastly, redraw the dart legs so they meet. Use the original dart legs and simply extend them until they meet.
